
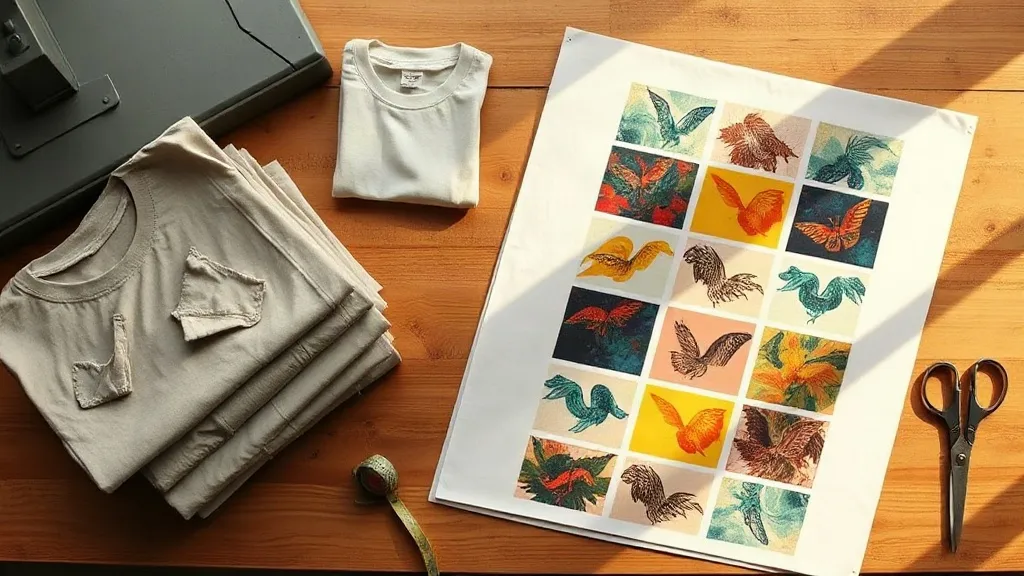
Most print shops learn the hard way that a cheap blank can cost more than it saves. You press a transfer onto a lightweight tee, pull the carrier sheet, and watch the design stretch, crack, or sink into a fabric that never had enough body to begin with. That is the moment shaka wear stops being just another name on a wholesale list and starts looking like a sensible default. Their heavyweight cotton and fleece lines are built with enough density that a DTF transfer has something solid to bond to, which matters far more than most people expect when they are ordering blanks by the dozen.
This guide is written for the person standing over a heat press at 11pm with a stack of orders and a film roll that is running low. We will look at what makes these blanks behave well under transfer printing, how to match fabric weight to the garment's job, and how to batch a full run of designs onto one sheet so you stop paying for wasted film.
What Actually Matters in a Blank for DTF Work
Before talking about any specific brand, it helps to be clear about the physics. A DTF transfer is a layer of pigment ink bonded with a thermoplastic adhesive powder. When you press it, that adhesive melts into the fibers of the garment. The bond is mechanical, not chemical, which means the surface texture and fiber composition of the blank decide how well the print survives washing.
Fiber content and surface texture
One hundred percent cotton takes a DTF transfer beautifully because the fibers are absorbent and slightly rough at a microscopic level, giving the adhesive plenty to grip. Cotton and polyester blends also work well, though the polyester side can shift the hand feel slightly. The trouble starts with fabrics that have a heavy silicone wash, a slick resin finish, or a very open knit. The adhesive cannot bite into a surface that has been engineered to be smooth.
Heavyweight cotton jersey, the kind used in Shaka Wear's core tee line, sits right in the sweet spot. It has a tight enough knit that the transfer does not telegraph through, and enough surface texture that adhesion is reliable across the full print area.
Fabric weight and how it changes your press settings
Weight is usually quoted in ounces per square yard, or GSM if you are working with metric suppliers. A 5.3 oz tee is a standard retail weight. A 6.5 to 7 oz tee feels substantial and holds a large back print without the fabric sagging under the weight of the ink layer. Fleece is a different animal entirely, and this is where a lot of shops get into trouble.
Thicker fabric absorbs heat more slowly and holds it longer. If you press a heavyweight hoodie at the same settings you use for a lightweight tee, the adhesive may not reach full activation before you pull the sheet, or the fabric may hold heat so long that the carrier releases unevenly. A simple adjustment: add five to eight seconds to the press time and use firm, even pressure rather than trying to compensate with temperature alone.
Matching the Blank to the Job
Not every order needs the heaviest garment in the catalog. Here is how to think about the choice in practical terms.
- Retail and merch drops: go heavyweight. Customers judge quality by feel, and a dense cotton tee reads as premium before the print is even noticed.
- Event and promo runs: a mid-weight tee keeps costs down while still printing cleanly. Order a sample first so you know how the fabric behaves.
- Workwear and uniforms: prioritize wash durability. Dense cotton with a tight knit survives repeated industrial laundering far better than loose, open weaves.
- Fleece and hoodies: check the interior finish. A brushed interior is comfortable but can interfere with adhesion if the transfer is placed too low on the body, so keep placements on the smoother outer face.
Color and opacity considerations
White ink is the foundation of most DTF prints, and it behaves differently depending on the garment color underneath. On white and light garments, a thin white layer is usually enough. On black or deep navy, you need a solid white base or the design will look muddy and the colors will shift. This is not a blank problem, but it is a blank-adjacent decision: if you are printing a lot of dark garments, budget for the extra ink and time.
There is also a subtle issue with very dark, heavily dyed fabrics. Some low-cost blanks bleed dye during the first wash, which can tint a light-colored print. Pre-washing a sample is the only reliable way to catch this before it reaches a customer.
Batching a Full Run Without Burning Film
Once you have settled on a blank, the next cost center is film. Every square inch of unused space on a sheet is money. This is where a DTF Gangsheet Builder earns its keep. Instead of printing one design per sheet, you arrange multiple designs onto a single long sheet, nest them tightly, and send the whole thing to the printer in one pass.
The practical workflow looks like this:
- Group orders by garment color and fabric, since press settings will be the same for the whole batch.
- Nest designs on the sheet with consistent spacing. Leave enough margin that you can trim cleanly without clipping the artwork.
- Add registration marks or a small trim guide so cutting goes faster and mistakes drop.
- Print one test sheet at the actual size before committing to a long run.
- Track your yield. If you are consistently filling less than 70 percent of the sheet, your nesting needs work.
A well-nested sheet can cut film waste by a third or more on a mixed order, and the time savings on trimming and pressing add up across a week.
Press Settings That Actually Hold Up
Every press runs a little differently, so treat these as starting points and dial them in with a wash test.
- Temperature: 300 to 320 degrees Fahrenheit for cotton and cotton blends.
- Pressure: medium to firm, enough that you can see the garment texture through the carrier sheet.
- Press time: 10 to 15 seconds for the initial press, then a short second press after the carrier is peeled.
- Peel: warm peel for most transfers. Cold peel only if the manufacturer specifies it.
One habit worth building: press a scrap of the same fabric with a small test print and run it through five wash cycles before you commit a large order. It takes a day and saves a lot of arguments.
Common Mistakes Worth Avoiding
The most frequent failure we see is pressing through a fold or seam. The transfer cannot bond where the fabric is doubled over, and the result is a print that lifts at the edge after a few washes. Lay the garment flat, smooth it, and check for wrinkles before the press comes down.
The second is skipping the pre-press. A quick three-second press before placing the transfer removes moisture from the fabric, and moisture is the quiet enemy of adhesion. It is a small step that makes a visible difference on humid days.
The third is over-relying on temperature to fix a pressure problem. If the transfer is not sticking, check the pressure and the fabric surface before you crank the heat up and risk scorching the garment.
Frequently Asked Questions
Do Shaka Wear blanks work well with DTF transfers?
Yes. Their heavyweight cotton jersey and fleece lines have a tight knit and enough surface texture for the adhesive powder to bond reliably. As with any blank, run a wash test on a sample before committing to a large order.
Can I use a DTF Gangsheet Builder for small orders?
Absolutely. Batching is not only for large runs. Even a handful of designs nested onto one sheet saves film and setup time, and it keeps your press workflow consistent across a mixed batch of orders.
What fabric weight should I pick for hoodies that will be washed often?
Go with a denser fleece and keep print placements on the smoother outer face rather than the brushed interior. Dense fabric holds its shape through repeated washing and keeps the print from distorting.
Why does my transfer lift at the edges after washing?
Usually it is one of three things: insufficient pressure, pressing over a seam or fold, or moisture in the fabric at the time of pressing. Pre-press the garment briefly and check that it lies completely flat before applying the transfer.
How much film can I actually save by nesting designs?
It depends on the mix of designs, but a tightly nested sheet on a mixed order commonly saves around a third of the film compared to printing one design per sheet. Track your fill percentage for a week and you will see where the waste is.