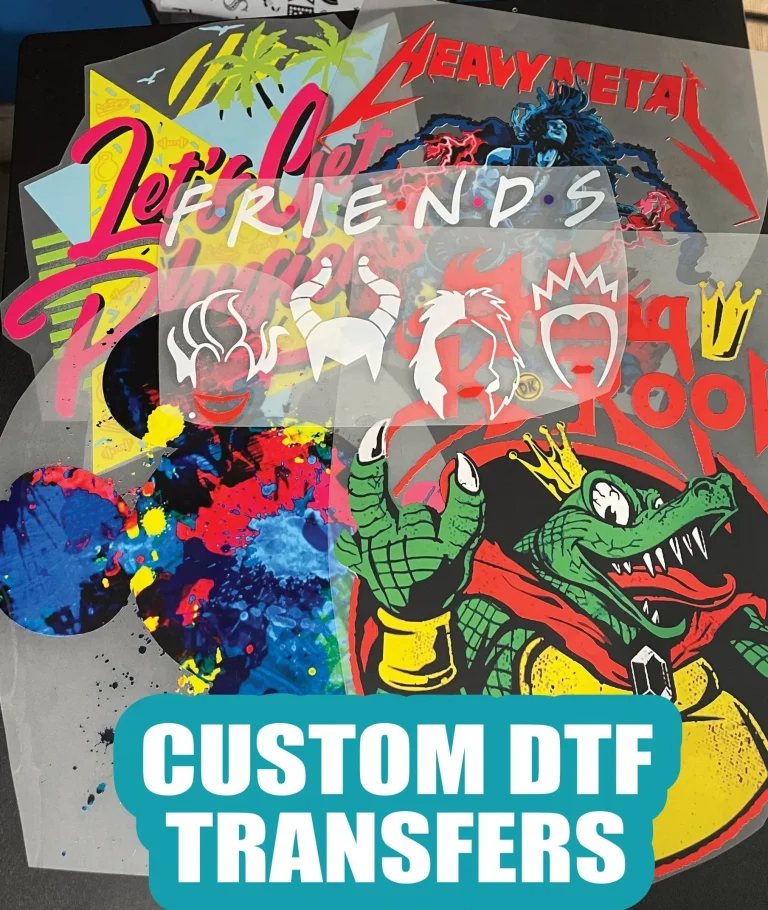
DTF Design Mistakes: How to Avoid Common Printing Errors
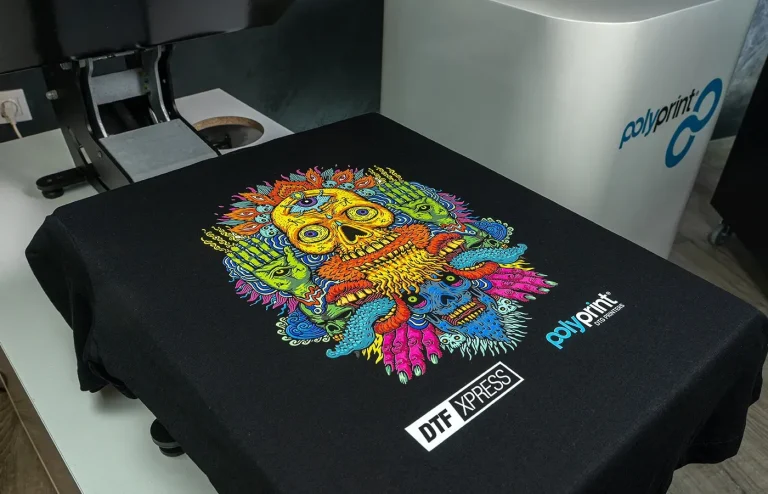
DTF design mistakes can derail even the most promising concepts, turning bold ideas into blurred, misaligned prints on fabric and undermining your brand’s perceived quality and eroding customer trust. Understanding DTF printing tips and applying DTF transfer design best practices helps ensure colors stay vibrant, edges stay sharp, and ink sits evenly on a range of fabrics, from cotton tees to blends, across seasons and applications. A common pitfall is working with low-resolution assets, underscoring the need for DTF image resolution guidelines that specify 300 DPI at your final print size and, where possible, vector artwork for logos, badges, or typography, to maintain clarity on large formats. Equally important is DTF color management, including monitor calibration, ICC profiles, soft-proofing, and consistent lighting in the workspace to prevent color shifts when transferring designs, ensuring consistency across batches and venues. When these elements are aligned, the risk of reprints drops and results look more professional across garments, boosting client satisfaction, repeat business, and overall production efficiency for studios working with multiple campaigns.
In the broader vocabulary of digital-to-fabric workflows, many people describe these challenges as DTF errors or direct-to-film transfer missteps, rather than as a single design flaw. Using an LSI-informed lens, we can discuss ink behavior on various substrates, color fidelity, image integrity, and prepress readiness to frame the topic without echoing a specific keyword. By focusing on texture, contrast, scalability, and validation workflows, designers build resilience—ensuring that the final transfer looks correct on different garments and across production runs.
DTF design mistakes: Practical strategies to avoid common errors
DTF design mistakes can derail print quality before you even press start. By understanding how image resolution, color management, and garment behavior interact, you can preempt many problems. This section focuses on the most frequent missteps—from low DPI and improper scaling to neglecting the white underbase—that disrupt the final transfer. Leveraging DTF printing tips and DTF transfer design best practices helps keep your artwork crisp and readable on the target fabric.
To prevent these issues, adopt a thorough preflight routine. Start with artwork designed at the final print size, preferably in vector for scalable elements and 300–600 DPI for raster assets. Implement color-managed workflows, calibrate monitors, and test on similar fabrics to ensure your designs translate faithfully from screen to textile. By planning around safe zones, margins, and substrate behavior, you reduce the chance of blurring, miscoloring, or misalignment.
DTF Printing Tips for Consistent Color and Detail
Consistency begins with high-quality source files and deliberate file preparation. Use vector artwork for logos and type whenever possible, and ensure raster images meet 300–600 DPI at the final print size. This aligns with practical DTF printing tips and helps minimize pixelation and edge fuzz during the transfer.
Soft-proofing and color-managed workflows are essential for reliable color reproduction. Calibrate monitors, use ICC profiles, and verify colors with a test print on similar fabric. Planning for dark fabrics with a white underbase and documenting bleed and margins ensures your on-garment colors stay vibrant and readable, reducing the need for reprints.
DTF Transfer Design Best Practices for Multi-Size Artwork
Designing for multiple garment sizes requires scalable elements and careful placement. DTF transfer design best practices emphasize bold shapes, clear typography, and consistent alignment so artwork maintains legibility across sizes. Prepare multi-size artwork with scalable components, ensuring key elements stay within safe zones and avoid edge cropping.
Color separation and orientation also matter. Keep separations clean to preserve shape and readability after transfer, and consider mirror settings only if your workflow requires it. By prioritizing solid fills and high-contrast shapes, you create durable prints that perform well on a range of fabrics and sizes.
DTF Image Resolution Guidelines: From Pixel to Print
Design at the final print size when possible, and if scaling is needed, adjust DPI proportionally to maintain sharpness. This aligns with DTF image resolution guidelines and reduces the risk of blur after transfer. Vector logos and text help avoid pixelation, especially on large prints.
For photos and complex artwork, aim for a minimum of 300 DPI at the intended print dimensions and avoid upscaling heavily compressed raster files. Export in lossless formats like TIFF or PNG when sharing with printers to preserve fidelity and minimize compression artifacts that become visible on the final transfer.
DTF Color Management: Achieving Accurate Reproductions
Color accuracy starts with device calibration and consistent lighting. DTF color management relies on ICC profiles, soft proofing, and working in CMYK when possible to minimize unexpected shifts post-transfer. Establishing a reference chart and following a color-managed workflow helps align on-screen colors with the final fabric print.
Test prints are essential. Run small batches to verify color accuracy, compare to client expectations, and adjust in the design stage. By iterating with color proofs and maintaining standardized color profiles, you reduce surprises and deliver more predictable, repeatable results.
Practical Workflow: From Concept to Final Print in DTF
A practical workflow bridges design, proofing, and production. Start by gathering specs—fabric type, color, print size, and placement—and prepare deliverables with vector assets, correct DPI, bleed, and margins. This aligns with a disciplined DTF printing process and supports efficient production.
Preflight, test prints, and iteration are the backbone of quality control. Check fonts, embedded images, and color profiles before sending to print, then perform a fabric test to validate underbase, opacity, and placement. Final production should lock in templates, maintain consistent settings, and monitor quality across batches, guided by DTF color management and image resolution guidelines to ensure reliable outcomes.
Frequently Asked Questions
What are the most common DTF design mistakes that cause pixelation or blur, according to DTF image resolution guidelines, and how can I avoid them?
The biggest culprits are low image resolution and upscaling. Design or source artwork at the final print size with a minimum of 300 DPI; use vector artwork for logos; avoid upscaling raster images to prevent blur and grain. Refer to DTF image resolution guidelines and run a small test print to confirm sharpness before production.
How does substrate variation contribute to DTF design mistakes, and how can I account for it while following DTF transfer design best practices?
Different fabrics absorb ink differently and can affect vibrancy. Always test on a sample fabric swatch; design with the garment in mind, allowing for seams and edges; follow DTF transfer design best practices to ensure consistent results across different fabrics and colors.
Why is skipping a white underbase a DTF design mistake, and how does it relate to DTF color management?
On dark fabrics, the white underbase is essential to keep colors bright and readable. Skipping it can make colors appear muddy or washed-out. Plan your design with a white underbase in mind and use color-managed workflows to predict and verify final results.
How do overly intricate details create DTF design mistakes, and how can I simplify designs while maintaining impact according to DTF printing tips?
DTF prints rely on printing dots; very fine details can blur due to dot gain and printing limitations. Simplify complex patterns, increase line thickness, and test how fine lines render on the transfer film. This aligns with DTF printing tips and transfer design best practices for durable, readable designs.
What color management mistakes commonly affect DTF design, and what practical steps help manage colors across devices?
Designing in RGB and assuming exact translation to print can cause color shifts. Use CMYK when possible, perform soft-proofing, and calibrate monitors. Employ ICC profiles and run test prints to verify colors before production.
What quick workflow steps can help prevent common DTF design mistakes, and how do DTF printing tips and image resolution guidelines fit in?
Start with gathering specs, prepare files with correct DPI, bleed, margins, and color profiles, and perform a preflight check. Print a test on similar fabric to evaluate color, underbase, opacity, and placement, then adjust and finalize templates for production. Following practical DTF printing tips and image resolution guidelines at each step minimizes repeat errors.
| Issue | Why it Matters | Best Practices / How to Avoid |
|---|---|---|
| Low image resolution and poor scaling | Leads to pixelation, blur, and loss of sharpness when printed at final size. | Design or source artwork at 300 DPI minimum for final print size; use vector for logos; for large prints, target 300–600 DPI or use scalable artwork. Avoid upscaling raster images. |
| Not accounting for the transfer substrate | Fabrics absorb ink differently; a design may look great on one fabric but dull on another. | Test on a fabric swatch; design with the garment in mind; leave space for seams; avoid fine details near garment edges; consider transfer-specific adjustments. |
| Ignoring the white underbase and layer order | On dark/heather fabrics, colors can look muddy without an underbase. | Plan for a white underbase in the design; include the underbase layer in your workflow; ensure colors read clearly on the chosen fabric. |
| Overly intricate details and dot gain | Fine details can blur or disappear due to dot gain in the printing process. | Simplify complex patterns; increase line thickness; test how fine lines translate on transfer film; balance detail with readability. |
| Misused color modes and poor color management | RGB workflows often shift when printed; colors may not reproduce accurately. | Work in CMYK when possible or soft-proof RGB projects; calibrate monitors; use color-managed workflows to align on-screen and final results. |
| Text at risk of legibility | Text may become illegible due to weaving and contrast on fabric. | Use bold, high-contrast fonts; avoid overly decorative type for small sizes; convert to outlines or use high-contrast rasters when needed. |
| No clear safe zones and margins | Designs too close to garment edges can crop or fold during application. | Leave consistent safe margins; align key elements away from edges; plan with safe zones in mind. |
| Practical Workflow Checklist | — | Gather specs, prepare files with proper DPI/bleed/margins, preflight fonts/images and color profiles, print a test on the actual fabric, adjust and iterate, then proceed to final production and monitor quality. |
Summary
HTML table provided above summarizes the key points of the base content regarding DTF design mistakes, focusing on common issues and practical fixes to improve print quality. It translates the detailed guidance into clear, actionable recommendations aligned with DTF printing tips, transfer design best practices, image resolution guidelines, and color management.