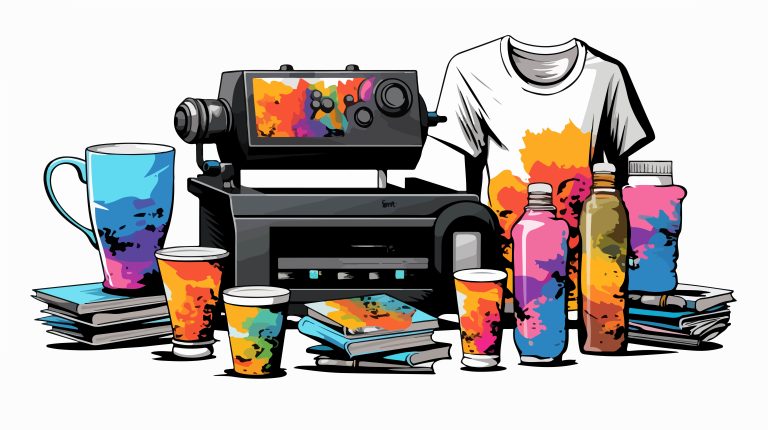
UV DTF printing issues: Comprehensive Troubleshooting Guide
UV DTF printing issues can derail even meticulous workflows, leaving colors muted, bands visible, and images peeling after transfer. By framing the problem as a system of interdependent steps, you can quickly identify root causes affecting your equipment. Common culprits include curing variability, ink-film compatibility, substrate preparation, and environmental factors that subtly undermine image fidelity. This guide offers practical checks and micro-tests designed to improve reliability without expensive rewrites of your workflow. With methodical checks and focused practice, you can turn UV DTF challenges into smooth, repeatable results through targeted DTF transfer troubleshooting.
From a broader perspective, the challenge centers on how UV-curable ink interacts with transfer films and substrates, and how light exposure shapes the final appearance. In LSI-friendly terms, this means focusing on ink chemistry, film compatibility, curing energy, feed stability, and color management as a single ecosystem. When you optimize these factors together, you’ll see improvements in print consistency, color fidelity, adhesion, and durability across runs. Practical strategies include selecting ink-film pairings with proven performance, maintaining consistent curing distances, and validating setups with repeatable test patterns. Reframing the issue in these terms helps teams communicate more clearly and drive dependable results on high-volume production.
1. Understanding UV DTF Printing Fundamentals for Consistent Results
Understanding UV DTF printing starts with recognizing how the ink, transfer film, and substrate interact under curing light. The goal is to achieve reliable adhesion, accurate color, and durable prints, all while maintaining fast production speeds. When you study the core factors—ink chemistry, film compatibility, curing wavelength, and substrate surface—you begin to see how each variable can affect UV DTF output. This perspective also lays the groundwork for practical improvements in print quality and process stability, supporting broader goals like DTF print quality improvements and smoother workflows.
In practice, establishing a solid baseline reduces the odds of chasing symptoms. Ensure clean print heads, proper alignment, and the correct transfer film for your ink system. By aligning media choice, curing setup, and color management from the start, you create a foundation that makes subsequent troubleshooting more targeted and less disruptive. This approach echoes the broader objective of UV DTF printing troubleshooting: isolate variables, reproduce results, and steadily optimize with repeatable tests.
2. Diagnosing DTF Printer Issues Early to Save Time and Material
A methodical diagnosis of DTF printer issues helps you distinguish real faults from temporary hiccups. Common symptoms such as banding, misalignment, or inconsistent ink deposition often point to mechanical or workflow problems rather than backend chemistry. By focusing on the most probable causes—head health, transport reliability, and accurate color workflow—you can reduce waste and downtime. This is a core component of effective DTF printer issues troubleshooting.
Adopting a structured workflow makes fixes faster and more predictable. Start with a basic check: clean heads, verify alignment, and confirm ink levels and film compatibility. Then proceed to a controlled test print or swatch to compare against a reference. Regularly documenting results helps you track what works and what doesn’t, reinforcing a repeatable approach to DTF transfer troubleshooting and long-term print reliability.
3. Tackling DTF Ink Curing Problems for Durability and Color Integrity
DTF ink curing problems manifest as washed-out colors, brittle textures, or color shifts after finishing. The root cause often lies in the curing system: lamp intensity, distance, or dwell time; ink viscosity; and film interaction. Addressing these factors requires balancing exposure with substrate tolerance, ensuring you don’t over- or under-cure, which can compromise adhesion and flexibility. Proper curing controls are essential for reliable UV DTF outcomes and improved durability.
To fix curing-related issues, start by testing lamp performance with a radiometer if available and verify that the lamp distance matches manufacturer guidance for your film and ink. Adjust dwell time or pass speed to achieve uniform exposure across the print. Remember to validate the film’s compatibility with the UV inks, as the wrong combination can undermine cure performance and color density.
4. Color Management and Calibration for Consistent Output and Improvements
Color fidelity hinges on calibrated devices, accurate profiles, and proofing that mirrors the final transfer. Implement color calibration with a reliable colorimeter and soft-proofing to set expectations before printing. The process supports DTF print quality improvements by ensuring that monitor proofs align with on-film results, reducing surprises during production. Effective color management also helps you minimize banding, ghosting, and hue drift across runs.
A practical color workflow includes generating or selecting ICC profiles tailored to your media and ink set, performing regression testing, and maintaining a regressive library of test swatches for each substrate and film. Regularly reproof after changes—ink reformulations, film swaps, or hardware updates—helps sustain consistent color across batches and aligns with best practices in UV DTF printing troubleshooting and printer reliability.
5. UV DTF Printing Issues: A Practical Troubleshooting Roadmap
When you encounter UV DTF printing issues, a concise, repeatable roadmap helps you isolate causes quickly. Start with the basics: verify clean heads, proper alignment, and a stable ink supply; confirm curing conditions (lamp brightness, distance, and dwell time); and validate color management with the correct ICC profile. This structured approach embodies the core of UV DTF printing troubleshooting.
Next, scrutinize the media path, substrate prep, and adhesion readiness. Run controlled tests such as a simple swatch and a gradient to compare against a reference, using the same media and settings each time to isolate variables. By documenting outcomes and iterating with small adjustments, you can resolve common UV DTF printing issues more efficiently and with less guesswork, reinforcing a reliable transfer-to-substrate process.
6. Transfer, Adhesion, and Substrate Prep for Reliable Results
Adhesion quality begins with proper surface preparation and film compatibility. Surface primers or adhesion promoters, along with clean substrates, reduce the risk of edge lift or peel after transfer. This aligns with the broader goal of DTF transfer troubleshooting: ensuring the film-substrate pair behaves consistently under heat and pressure. When adhesion is predictable, you can focus more on color and detail during the transfer stage.
Choosing the right substrate and film, plus matching heat-press parameters, is essential for durable, trouble-free results. Document the substrate type, film brand, and heat-press settings so future runs replicate successful combinations. Ongoing testing helps you optimize for different product lines and aligns with preventive practices in UV DTF printing issues management, supporting long-term print quality improvements and transfer reliability.
Frequently Asked Questions
In UV DTF printing troubleshooting, what are the common causes of faded colors in UV DTF printing issues, and what steps can I take to fix them?
Faded colors usually come from inconsistent ink density, under or over curing, or color management mismatches. To fix, recalibrate with a known ICC profile for the media, verify ink loading, check the curing lamp distance and power, ensure the transfer film is compatible with the inks, and run a controlled swatch to compare against a reference.
DTF printer issues causing banding in UV DTF printing issues: what steps should I take to diagnose and fix banding?
Start with a head alignment and nozzle check to ensure consistent ink delivery, verify the media is flat and firmly locked in the feed path, and clean the feed rollers and heads to remove residue. If needed, reduce print speed or switch to a mode that allows more stable ink deposition, and confirm color separation and halftone settings align with the design.
DTF transfer troubleshooting how to address ink smear on the transfer film in UV DTF printing issues?
Ink smear is usually from insufficient drying time, solvent interactions, or film incompatibility. Allow adequate drying between layers, use a film designed for UV inks, clean the film surface, and adjust ink viscosity per manufacturer guidelines to improve flow without sacrificing adhesion.
DTF ink curing problems: how can I diagnose and fix inconsistent curing in UV DTF printing?
Check lamp age and distance, measure lamp intensity with a radiometer if available, and ensure the curing dwell time is appropriate for the ink and film. Calibrate pass alignment, and test with shorter passes or slower speeds to increase cure time without overheating.
DTF transfer troubleshooting: how can I prevent poor adhesion or peeling after transfer in UV DTF printing?
Prepare the target surface with the recommended primer or adhesion promoter, confirm the transfer film and substrate are compatible, and verify heat-press temperature, time, and pressure align with manufacturer guidelines. Run a small trial on the same substrate before a larger run.
DTF print quality improvements: what steps help maintain color consistency across batches in UV DTF printing?
Calibrate printers to produce repeatable color, use the same media lot when possible, apply consistent ICC profiles and soft-proofing, and store inks and films under recommended conditions. Keep a library of regression test swatches and re-test after any ink or hardware changes to ensure stable results.
| Topic | Key Points |
|---|---|
| Understanding UV DTF printing and why issues occur | – UV-curable ink system + transfer film + curing lamp; success depends on precise control of ink chemistry, substrate compatibility, curing distance, and color management.n- Main issue categories: Ink/media interaction; Curing quality; Print settings and color management; Mechanical and environmental factors; Material/adhesion. |
| Practical troubleshooting workflow | – Verify basics: clean heads, alignment, ink levels; correct transfer film for ink chemistry.n- Check curing conditions: lamp brightness/uniformity; curing distance; idle time; stable power.n- Review color management: ICC profiles; soft-proof against calibrated reference; match print mode/resolution/color depth.n- Inspect media path and environment: head strikes, media warp, feed tension; humidity/temperature within recommended range.n- Run controlled test: print a swatch and a gradient; keep settings consistent. |
| Common issues (high-level) and fixes | – Faded/washed colors: recalibrate color; check ink density; inspect curing lamp; verify film compatibility; test with smaller substrate.n- Banding: align heads; secure media; clean rollers; adjust speed/mode; ensure proper color separation.n- Ink smearing: ensure drying between layers; use film compatible with UV inks; clean film surface; adjust viscosity per guidelines.n- Inconsistent curing: replace aging lamps; verify distance; calibrate pass alignment; adjust dwell time.n- Poor adhesion/peeling: surface prep; film/substrate compatibility; verify heat-press settings; run small trial.n- Color shifts between batches: calibrate for repeatable color; use same media lot; implement wash tests; proper ink/film storage. |
| Curing, ink chemistry, and color management | – Ink curing/chemistry: UV inks cure at a specific wavelength; improper exposure yields brightness loss or cracking; choose inks for film/surface; maintain viscosity.n- Lamp type and metrics: LEDs common; maintain distance and timing; failing lamp or wrong wavelength affects cure speed and density.n- Distance and dwell time: too far = under-cure; too close = over-cure; follow manufacturer guidelines; calibrate with small samples.n- Media interaction: transfer film/substrate as layered system; document which film works best with which substrate. |
| Color management and print optimization | – Color calibration: monitor calibration with colorimeter; consistent lighting; soft-proofing.n- ICC profiles: use profiles for media/ink; create custom profiles if possible.n- Test swatches/regression: maintain library; re-test after ink/hardware changes.n- Halftone/resolution: balance detail with pigment density; higher resolution may need careful ink management to avoid bleed. |
| Maintenance practices | – Routine maintenance: clean heads, wipe media path, inspect rollers; professional service for nozzle checks/head alignments as recommended.n- Lamp care: track hours; replace aging lamps before brightness loss.n- Ink storage: proper storage conditions; rotate stock.n- Media handling: use consistent media; keep films clean; avoid humidity/heat exposure. |
| Troubleshooting checklist | – Confirm hardware baseline: clean heads, alignment, ink levels.n- Verify curing setup: lamp intensity, distance, dwell time.n- Validate color management: ICC profiles, soft proof, and workflow consistency.n- Inspect media/substrates: compatibility, surface prep, adhesion readiness.n- Run a controlled test print: compare against a reference.n- Document outcomes: note settings, film type, substrate, and results for future reference. |