DTF transfers: The complete step-by-step beginner guide
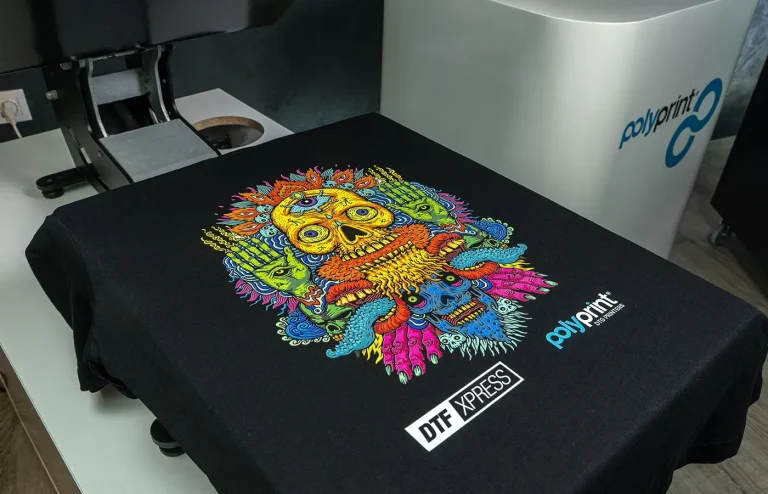
DTF transfers offer a vibrant, durable way to decorate garments, making it the go-to choice for hobbyists and small businesses. In this introductory guide, you’ll learn DTF printing basics, the key tools you’ll need, and the core DTF transfers steps to move from concept to finished garment. This article also compares DTF vs heat transfer, helping you decide which method fits your fabric and budget. With a soft hand feel and broad fabric compatibility, direct-to-film printing has become a popular option for designs with full color. By the end, you’ll feel confident applying DTF transfers to a range of fabrics and finishes.
Viewed through a different lens, the film-to-fabric transfer process uses an ink-on-film approach to deliver vibrant images via a heat press. This technique often goes by terms like direct-to-film workflow or film-based decoration, emphasizing the same end goal of durable, high-detail results. You’ll also hear phrases such as the DTF process, adhesive-cured film transfers, and garment-ready prints that signal a flexible production path for varied fabrics. As you explore these synonyms, you’ll appreciate how the method maintains color depth, softness, and wash durability across many apparel projects.
DTF Transfers for Beginners: A Step-by-Step Overview
Whether you’re just discovering DTF transfers, this guide breaks down the concept of direct-to-film printing in plain terms. DTF transfers offer bright color, a soft hand feel, and broad compatibility across fabrics, making them a popular choice for hobbyists and small businesses alike. This overview introduces the core idea, why beginners gravitate to DTF transfer for beginners, and how the process translates from concept to finished garment. By outlining the DTF transfers steps at a high level, you’ll gain confidence to explore designs and start experimenting.
Getting started means knowing the key gear and a practical workflow. When we talk about DTF printing basics, think a printer with true white ink capability, DTF transfer film, powder adhesive, heat press, and a clean workspace. Following the DTF transfers steps, you will prepare your design (mirroring for transfer), test on scrap fabric, cure the adhesive correctly, and apply the transfer with the right temperature and timing. Understanding direct-to-film printing in simple terms helps beginners see how each step fits into the final, durable image.
DTF Printing Basics and How It Compares to Other Methods
As you move beyond the basics, you’ll select materials and gear with care. DTF printing basics cover choosing the right film, powder adhesive, and printer settings to maximize color fidelity and adhesion. You’ll also learn how white underbase can improve vibrancy on dark fabrics, and how calibration and color management affect final results. This foundation helps ensure consistent outcomes across different fabrics and designs, paving the way for reliable DTF transfers.
When evaluating method options, a direct comparison of DTF vs heat transfer is essential. DTF transfers typically offer a softer hand feel, better color reproduction, and greater durability on a range of fabrics compared with standard heat transfer. By framing your workflow around DTF transfers steps—from design to cure—you’ll understand when this method is the best fit and how to optimize results within your budget and production scale.
Frequently Asked Questions
What are the DTF transfers steps for beginners, and how does direct-to-film printing work?
DTF transfers steps for beginners typically follow this workflow: plan the design in a color-managed workflow, print on DTF film with true white ink, apply and cure a thin powder adhesive, pre-press the garment and run a test, align the film and perform the transfer at about 180–190 C (356–374 F) for 12–20 seconds, then post-press briefly and follow care guidelines. This sequence covers the core steps in direct-to-film printing and highlights the DTF printing basics needed to achieve vibrant, durable results on a range of fabrics.
DTF vs heat transfer: when should you choose DTF transfer for beginners, and how does direct-to-film printing compare in durability and feel?
DTF transfer for beginners benefits include color richness, soft hand feel, and strong durability across many fabrics, with on-demand capability and simpler setup than screen printing. Direct-to-film printing delivers vibrant images on cotton and blends, usually with a lighter, more flexible finish than standard heat transfer. DTF transfers are ideal for small runs or multi-color designs; for very large orders or simple color blocks, heat transfer or screen printing may be more cost-effective depending on the project.
| Section | Key Points | Notes |
|---|---|---|
| Introduction | New to DTF transfers; step by step guide from concept to finished garments; vibrant color, soft hand feel; compatible with many fabrics; essential gear; the step by step process; troubleshooting and best practices; build confidence in direct to film concepts. | Overview of the beginner friendly scope and goals. |
| What are DTF transfers and why choose them | Direct to film printing process: ink deposits on film, powder adhesive, and heat press; results are bright and durable with a smooth feel; forgiving for beginners; works on multiple fabrics; no separations or screens required; ideal for text logos and photo style designs. | Key advantages for beginners. |
| Main terms overview | DTF transfers; Direct to film printing basics; DTF transfer steps; DTF transfer for beginners; DTF vs heat transfer | Glossary pointers. |
| What you need to get started | Quality materials and proper settings. Essentials include a DTF printer or service, white ink capable film, DTF transfer film, powder adhesive, a heat press, heat resistant tape, silicone sheet, a clean workspace, and garments suitable for transfer such as cotton and cotton blends. | Beginner kit checklist. |
| Step 1: Prepare your design and workflow | High resolution image in PNG or TIFF; color managed workflow; consider a light or white underbase for darker fabrics; mirror image so text and graphics are oriented correctly; add white underbase under colors as needed; save final file and prepare for printing. | Preparation considerations. |
| Step 2: Print on the DTF film | Printer with true white ink capability; optimize for color fidelity and edge sharpness; keep film clean; verify white ink prints beneath or around the colored layers; inspect film for defects before moving to adhesive stage. | Printing tips. |
| Step 3: Apply the powder adhesive and cure | Evenly apply a thin, uniform coating; avoid too much powder to prevent a dusty feel; cure with a heat source to fix the adhesive; light cure helps prevent smudging during handling. | Adhesive curing details. |
| Step 4: Prepare the garment and run a test press | Pre-press the fabric to remove moisture and wrinkles; perform a small test on scrap fabric to gauge powder behavior and color stability; record garment type, fabric content, and press settings for consistency. | Testing guidelines. |
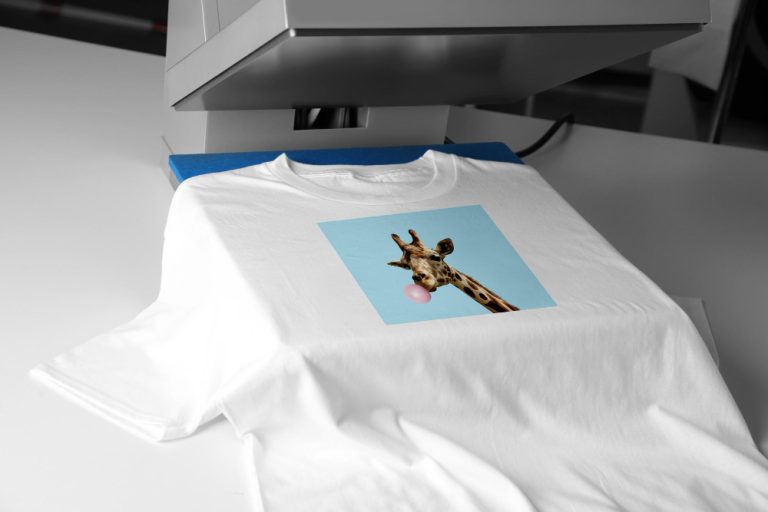
| Step 5: Align and perform the transfer | Place the printed film on the garment with the printed side down; secure edges with heat resistant tape if needed; maintain even pressure at about 180 to 190 C (356 to 374 F) for 12 to 20 seconds; remove film while hot or warm following guidelines; optional 2 to 3 second post press to set the image and reduce edge lift. | Alignment tips. |
| Step 6: Post transfer care and finishing touches | Allow the garment to cool and inspect for evenness and adhesion; re-press edges if needed; wash tests are strongly recommended before listing for sale; follow care guidelines: turn inside out, use cold or warm water, mild detergents; transfers are designed to stand up to multiple washes when properly cured and cared for. | Care guidance. |
| Step-by-step tips for consistent results | Keep a clean, dust-free workspace; use protective sheets and silicone mats; calibrate your printer and check color consistency frequently; manage powder adhesive for a light, even layer; test on varied fabrics; record all input variables to build a library of settings. | Practical tips. |
| DTF transfers vs other methods | Direct-to-film printing offers advantages like on-demand printing, faster setup for small batches, and good color detail across fabrics; softer hand feel and durable results; compared to heat transfer and screen printing, DTF can be more versatile for varied runs. | Usage and comparison. |
| Troubleshooting common issues | Faded colors or poor registration: verify printer calibration and color profiles; check white base for dark fabrics; powder not adhering: ensure adequate curing and heat time; cracking or peeling edges: reduce pressure or pressing time; white specks or dust: keep workspace clean and powder evenly applied. | Fixes and prevention. |
| Maintenance and care tips for DTF transfers | Maximize print life with proper washing guidelines and temperatures; turn garments inside out; use mild detergents; avoid high heat in the dryer; run tests for complex designs to verify durability; proper cure and handling keep designs vibrant. | Durability tips. |
| DTF transfers vs other methods: when to use what | DTF transfers suit on demand, small runs, and complex color designs; for large identical runs screen printing may be more cost effective; for simple color blocks standard heat transfer may be faster but yields a heavier feel; align method choice with project goals. | Decision guidance. |
Summary
DTF transfers offer vibrant colors and durable results, making them a versatile option for beginners and professionals alike. This descriptive overview highlights the core steps, material choices, and press techniques needed to produce reliable outcomes across a wide range of fabrics. By following the guidance in this beginner friendly guide, you can build a repeatable workflow for applying DTF transfers that delivers professional grade designs on cotton, blends, and beyond. Remember to test settings on scrap material, keep detailed records, and tailor your approach to fabric type and color management to maximize long term results.