DIY UV DTF: Quick Projects You Can Start Today for Beginners
DIY UV DTF has opened a new world for crafters who want vibrant, durable designs without leaving home. If you’re curious about how to apply high-impact images to fabrics, phone cases, and more, this guide will walk you through everything you need to know to get started today. You’ll learn what UV DTF is, why this approach can be both fun and cost-effective, the tools and materials required, a clear step-by-step workflow, practical tips for quality, troubleshooting advice, and creative project ideas to spark your next batch of transfers. With the right setup, you can confidently tackle your first transfer and start building a small, productive at-home workflow around it. From choosing the best heat press for DTF to selecting materials for UV DTF printing, this intro sets the stage for hands-on projects you can complete this week.
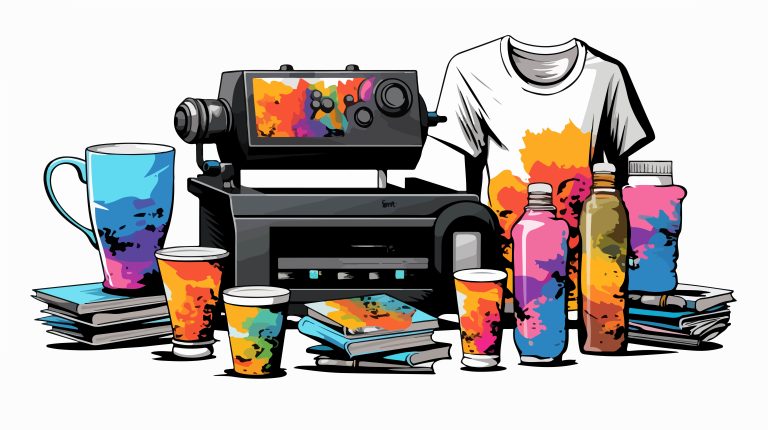
Seen through a different lens, this technique is a home-based direct-to-film process that uses UV-curable inks to embed vibrant images onto a transferable film. Think of UV DTF transfers as a boundary-pushing method for apparel, accessories, and decor where color fidelity and durability matter. Instead of conventional inks, the process relies on a white underbase when needed, a UV-curable topcoat, and a reliable heat press to bond the design to fabrics and hard surfaces. From an SEO perspective, this collection of projects highlights how DIY UV DTF projects can occupy a niche in creative at-home printing by offering bold results and durable finishes. A practical at-home setup centers on accessible equipment, careful curing, and routine testing to achieve consistent results. By exploring variations like different fabrics, topcoat options, and surface types, you can build a scalable, creative workflow without expensive studio gear. This approach also emphasizes careful curing, quality control, and long-lasting wash durability, making it suitable for small businesses testing product lines. By documenting success paths across fabrics, coatings, and surface textures, you can tailor your at-home DTF workflow to your unique creative goals.
DIY UV DTF at Home: Unlocking Creative Potential
DIY UV DTF at home opens a world of vibrant, durable designs for crafters who want control over color, texture, and timing. With UV DTF transfers you can achieve sharp detail and long-lasting images on everything from T-shirts to phone cases, all without leaving your workspace.
This guide to DIY UV DTF projects demonstrates a practical at-home workflow—from selecting the right materials for UV DTF printing to curing and finishing—so you can start creating new pieces today and iterate quickly.
Materials for UV DTF Printing: What You Need to Start
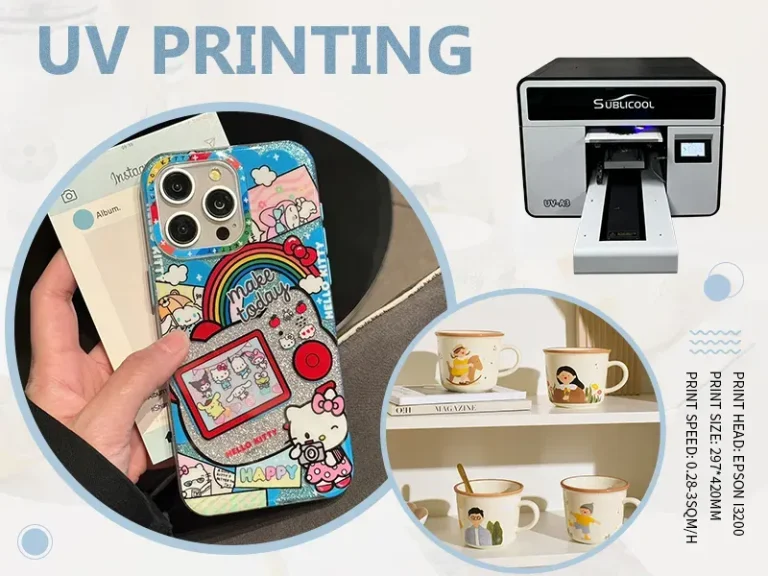
Having the right materials for UV DTF printing sets the foundation for reliable, repeatable results. Essential items include UV DTF transfer sheets or film, a printer configured for DTF printing at home, and a white underbase capability to keep colors bright on dark fabrics.
You’ll also want a UV-curable topcoat or clear layer for durability, a UV LED curing light for fast finishes, a heat press for transfer, parchment or silicone sheets for protection, and basic tools like weeding tools and masking tape.
DTF Printing at Home: Setting Up Your Equipment and Workflow
Start with a printer or access to DTF printing at home that can lay down a clean white underbase and vibrant colors on transfer film. Configure RIP software to preview color translation and ensure your film supports the white underbase on dark fabrics.
Develop a consistent workflow: design with white underbase in mind if the substrate is dark, print on transfer film, cure as required, then prepare for transfer with trimming, weeding, and alignment. A repeatable process improves results across projects.
Best Heat Press for DTF: How to Choose and Use It
Selecting the best heat press for DTF means prioritizing even heat, stable temperature control, adjustable time and pressure, and a platen size that suits your typical transfers. A quality machine helps minimize misregistration and ensures consistent adhesion.
Use heat press settings that match fabric type and transfer weight, pre-press to remove moisture, and use protective sheets. For multi-color UV DTF designs, ensure even pressure and consider a secondary cure step if your topcoat requires it.
UV DTF Transfers: Printing, Curing, and Finishing for Durability
Once the design is printed on UV DTF film with the white underbase and color layers, apply a UV-curable topcoat for added durability. Cure under a UV LED lamp according to product instructions to lock in color and protect against wear.
Finish by peeling according to hot or cold, then curing again if required. Care and wash instructions help customers protect the transfer for long life.
Creative Projects and Troubleshooting for DIY UV DTF Projects
Projects for DIY UV DTF projects span apparel, tote bags, phone cases, wall art, and home decor. Start with bold, high-contrast designs and plan how the surface will respond to the underbase and topcoat.
Common challenges include color bleed, misregistration, fading after wash, peeling edges, and uneven color. Solutions involve checking alignment, using reliable tape to hold transfers, verifying curing steps, and adjusting temperature, time, and pressure.
Frequently Asked Questions
What is DIY UV DTF and how can I start with DIY UV DTF projects at home?
DIY UV DTF refers to Direct-to-Film transfers that use UV-curable inks to print vibrant designs on a film you transfer to fabrics or hard surfaces. For DIY UV DTF projects and DTF printing at home, start by designing with a white underbase in mind for dark fabrics, print on UV DTF transfer film, trim and weed as needed, pre-press your item, apply the transfer with a heat press, and finish with UV curing or a topcoat for durability.
What materials for UV DTF printing do I need to start DIY UV DTF projects?
Essential materials for UV DTF printing include UV DTF transfer film, a printer suitable for DTF printing at home with white underbase capability, white ink, a UV-curable topcoat, a UV LED curing light, a reliable heat press, parchment or silicone sheets, weeding tools, masking tape, gloves, and a clean workspace. These form the core materials for your DIY UV DTF projects.
How do I choose the best heat press for DTF when doing DIY UV DTF transfers?
Choosing the best heat press for DTF is crucial for DIY UV DTF transfers. Look for even heat distribution, a capable temperature range around 320–330°F (160–166°C), adjustable pressure, consistent time control, and a platen size that matches your transfers. A good heat press reduces misregistration and ensures reliable results in DIY UV DTF projects.
What is the practical workflow for a typical DIY UV DTF project from design to cure?
Practical workflow for a DIY UV DTF project: design with white underbase in mind; print on UV DTF transfer film (including white underbase); cure per film instructions if required; trim and weed; pre-press the garment; align and press at 320–330°F for 12–15 seconds with medium pressure; peel hot or cold; cure the topcoat if used; cool and check adhesion.
What common challenges occur with UV DTF transfers and how can DIY UV DTF projects prevent them?
Common challenges include color bleed, misregistration, fading after wash, peeling edges, and uneven white underbase. Prevention tips: ensure precise alignment with tape and a stable pressing setup, verify proper curing, use a UV-curable topcoat and cure it fully, and test on scrap materials to dial in time/temperature for your fabric.
What are some beginner-friendly DIY UV DTF project ideas to try?
Beginner-friendly DIY UV DTF project ideas include custom T-shirts or hoodies, personalized tote bags, durable phone cases, small wall art or canvas panels, and gift coasters or patches. These DIY UV DTF projects help you practice design, transfer, curing, and finishing across different surfaces.
| Aspect | Key Points |
|---|---|
| Introduction |