DTF design tips: Create graphics that pop on fabric
DTF design tips are reshaping how designers approach fabric graphics, blending bold artwork with reliable workflow to deliver durable, vibrant prints. From mastering color management in DTF printing on fabric to selecting fabrics and textures, the process also covers heat transfer printing on textiles and how margins and alignment matter. This guide distills practical DTF design ideas into actionable steps, covering resolution, margins, and layering to keep edges sharp on a range of textiles. By optimizing for a wide palette and reproducibility, you can scale from small runs to larger orders without sacrificing detail or wash durability, supported by a proven DTF workflow for beginners. Whether you’re new to the process or expanding an established workflow, these tips help you stay consistent from file prep through press and cure.
Alternatively described as direct-to-film transfer for textiles or film-based fabric decoration, this printing method lets designers move bold art onto a wide range of garments. Think of it as a film-to-fabric workflow where adhesives and heat cure the design into fiber, yielding crisp edges and durable color on apparel. Other descriptors such as garment graphics production, textile transfer technology, or print-on-fabric systems emphasize substrate flexibility and color fidelity. This framing keeps the focus on repeatable results, sharp resolution, and compatibility with both natural fibers and synthetics. Whether you label it as DTF workflow for beginners or film-based printing for textiles, the goal remains the same: reliable quality at scale.
DTF Printing on Fabric: From Artwork to Durable, Vibrant Garments
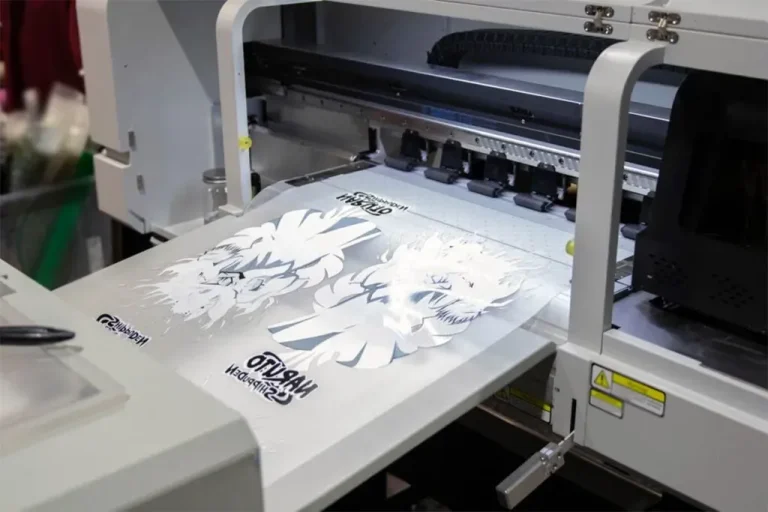
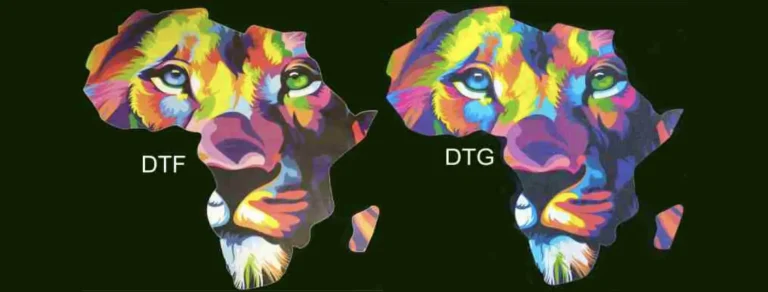
DTF printing on fabric has transformed how designers approach textile graphics, turning intricate artwork into wearable, durable prints. This approach enables broader color ranges and finer details than many traditional methods, making fabric graphics design feel more like art and less like a manufacturing constraint.
To make the most of DTF printing on fabric, start with artwork that scales cleanly and respects the fabric’s texture. Clean vector shapes for logos and type, paired with high-resolution raster elements, reduce edge softness after transfer. Plan for margins and alignment tolerances so the final garment maintains balance even when the fabric stretches or shifts during handling.
Clean, Scalable Artwork for Strong Fabric Graphics Design
A strong DTF design begins with scalable artwork. Vector graphics for sharp edges and text, combined with high-resolution raster textures for details, ensure your design holds up after the heat press and wash cycles. Keeping critical elements away from the edges helps maintain composition on all fabric types.
An essential step is exporting proofs at actual print size and evaluating them on the target fabric. This practice, woven through a fabric graphics design workflow, helps you anticipate how texture and fiber content will influence edge definition and color saturation, reducing the chance of surprises in production.
Color Management and Layering: Bringing DTF Design Ideas to Life
Color management is one of the most visible aspects of good DTF design ideas. Begin in a calibrated workflow, usually starting in RGB for a broad color latitude, then converting to a printer- and film-supported space. Create separate color channels for each element to maintain edge sharpness and prevent overlaps that muddy details during transfer and curing.
Layering ink is common in DTF printing to build depth and opacity. Think like a painter—decide which elements sit in front and which serve as a backdrop, using gradients and controlled opacity to mimic natural shading. Bold shapes paired with subtle shading improve legibility on fabric from both a distance and up close.
Resolution, Texture, and Typography: Preserving Detail on Textiles
Resolution is critical when designing for textiles. A target of 300–600 dpi at the print size helps produce crisp edges and fine textures, but fabric texture can dull perceived sharpness. When printing on textured fabrics, you may need to increase digital resolution slightly to compensate for texture-induced blurring.
Typography must read clearly on fabric. Use bold, high-contrast typefaces, and consider outlining or adding a soft background behind translucent letters. Kerning and letter spacing can be amplified by the transfer process, so testing multiple font weights and sizes on controlled fabric samples is essential before committing to a large run.
Fabric Choice and Heat Transfer on Textiles: Aligning Materials with Your Design
The fabric you select directly affects color vibrancy and durability. Polyester and poly-blends generally yield brighter results with DTF, while 100% cotton can reveal more texture and color shifts depending on adhesive and curing conditions. For stretch fabrics, consider how the material will move after washing and how that impacts the printed image.
With heat transfer on textiles, match your adhesive powder and curing temperatures to the fabric type to minimize cracking or peeling. Testing across fabric varieties helps you build a reliable palette of settings so your final products maintain their appearance through wear and washing.
DTF Workflow for Beginners: A Practical Guide and DTF Design Tips
A repeatable DTF workflow for beginners makes it easier to achieve consistent results. Start with a clean design, apply proper color management, and prepare your file with bleed. Print a small test piece to verify color fidelity, edge sharpness, and texture compatibility before moving to larger runs.
Apply the adhesive powder as instructed, cure it correctly, and press onto fabric with recommended temperature, pressure, and dwell time. Keeping a record of settings for different fabrics enables rapid iteration and consistent outcomes. As you gain experience, you’ll find that these DTF design tips—emphasizing repeatable steps and careful testing—help elevate fabric graphics design to reliable, high-quality production.
Frequently Asked Questions
What are the essential DTF design tips for crisp edges when doing DTF printing on fabric?
Start with clean vector shapes and high‑quality raster artwork. Use vector for logos and text, rasterize at a high print resolution, and keep important elements away from the edges to accommodate alignment tolerances in DTF printing on fabric. This approach helps maintain sharp edges after transfer.
How does color management affect fabric graphics design in a DTF workflow for beginners?
Work in a calibrated RGB workflow to maximize color latitude, then convert to a printer-friendly color space with ICC profiles. Test colors with sample runs since fabric can shift after transfer and curing. Build bold, high‑contrast palettes to keep saturation strong through the DTF process.
What are practical DTF design ideas to maximize durability and legibility for heat transfer printing on textiles?
Use bold shapes, strong contrast, and careful color separation to maintain legibility. Avoid very fine lines that can bleed after press, and consider soft gradients or controlled opacity to add depth without sacrificing edge sharpness. Always test designs on representative textiles to verify readability after curing.
Why is resolution and fabric texture important in fabric graphics design for DTF printing on fabric?
Aim for 300–600 dpi at print size for crisp edges, but recognize that fabric texture can soften detail. On textured fabrics, slightly increase digital resolution and export proofs at actual print size, then check details at 100% magnification to ensure crucial elements remain clear.
DTF design ideas for typography: how can I keep text legible on fabric during heat transfer printing on textiles?
Choose bold, high‑contrast typefaces, consider outlining text, and place it on a contrasting background to improve readability. Pay attention to kerning and letter spacing, and test multiple weights and sizes in controlled samples before committing to a large run.
How can I implement the DTF workflow for beginners to achieve repeatable results in fabric graphics design projects?
Follow a simple, repeatable sequence: start with a clean design, manage color, and include proper bleed margins. Print a small test piece to verify color fidelity and edge sharpness, apply the adhesive powder as directed, cure, then press at the recommended temperature, pressure, and dwell time. Keep notes of settings for each fabric type to reproduce successes and minimize waste.
| No. | Topic | Key Points |
|---|---|---|
| 1 | Start with clean, scalable artwork | Use vector for logos/text and high-res raster; keep edges clear and margins to accommodate alignment during transfer, important due to fabric stretch. |
| 2 | Color management matters | Calibrated RGB workflow, then convert to printer color space; manage separations/ICC profiles; test with samples; use bold, high-contrast palettes. |
| 3 | Plan for color separation and layering | Plan element order, use depth through layers, soft gradients/opacity; avoid delicate hairlines that blur; pair bold shapes with subtle shading for legibility. |
| 4 | Respect resolution and detail for fabric textures | Aim for 300–600 dpi at print size; fabric texture can soften edges; consider higher resolution for textured fabrics; export proofs at actual size and verify at 100%. |
| 5 | Typography that reads on fabric | Use bold, high-contrast type; avoid very small text; outline or add a light background behind translucent letters; kerning/tracking matters; test multiple font weights/sizes. |
| 6 | Prepare your artwork with proper margins and bleed | Bleed of at least 1/8 inch; keep critical detail away from edge; export TIFF/PNG with transparency for layered designs. |
| 7 | Fabric choice and its impact on design | Polyester/poly-blends yield brighter colors and durability; 100% cotton shows more texture/color shift; consider stretch and match adhesive/cure temps to fabric. |
| 8 | The DTF workflow for beginners: a practical outline | Clean design, proper color, bleed; print small test piece; apply adhesive powder, cure, press with recommended temp/pressure/dwell; document settings. |
| 9 | Troubleshooting common issues | If colors dull, re-check color profile; watch for bleeding/feathering; cracking from excessive heat/cure; washing durability depends on fabric/adhesive; build a fabric/settings library. |
| 10 | Design ideas to spark creativity | Mix strong concepts with practical execution: bold typography, layered photography with vector silhouettes; limited palettes or gradient pieces; tailor for garment type and viewing distance; seek inspiration widely. |
Summary
DTF design tips describe how to balance artistic intent with the practical realities of transferring ink to fabric. By planning for color management, resolution, edge sharpness, and fabric texture, you can craft graphics that not only look stunning on screen but also perform well in the real world. Remember to test early and iterate, paying close attention to how different fabrics respond to heat, pressure, and adhesive powders. With a thoughtful DTF workflow for beginners, you’ll reduce waste and speed up production while delivering vibrant, durable textile prints that customers will love. As you gain experience, you’ll develop a personalized set of tips and tricks that elevate your fabric graphics design to a consistently higher standard. The marriage of solid design principles with DTF-specific techniques is the key to graphics that truly pop on fabric.


